PartCrafter: one image, separate 3D parts
PartCrafter generates an object as several independent meshes instead of treating the whole object as one inseparable shape. That makes part-level edits a first-class feature of the result, not an afterthought.
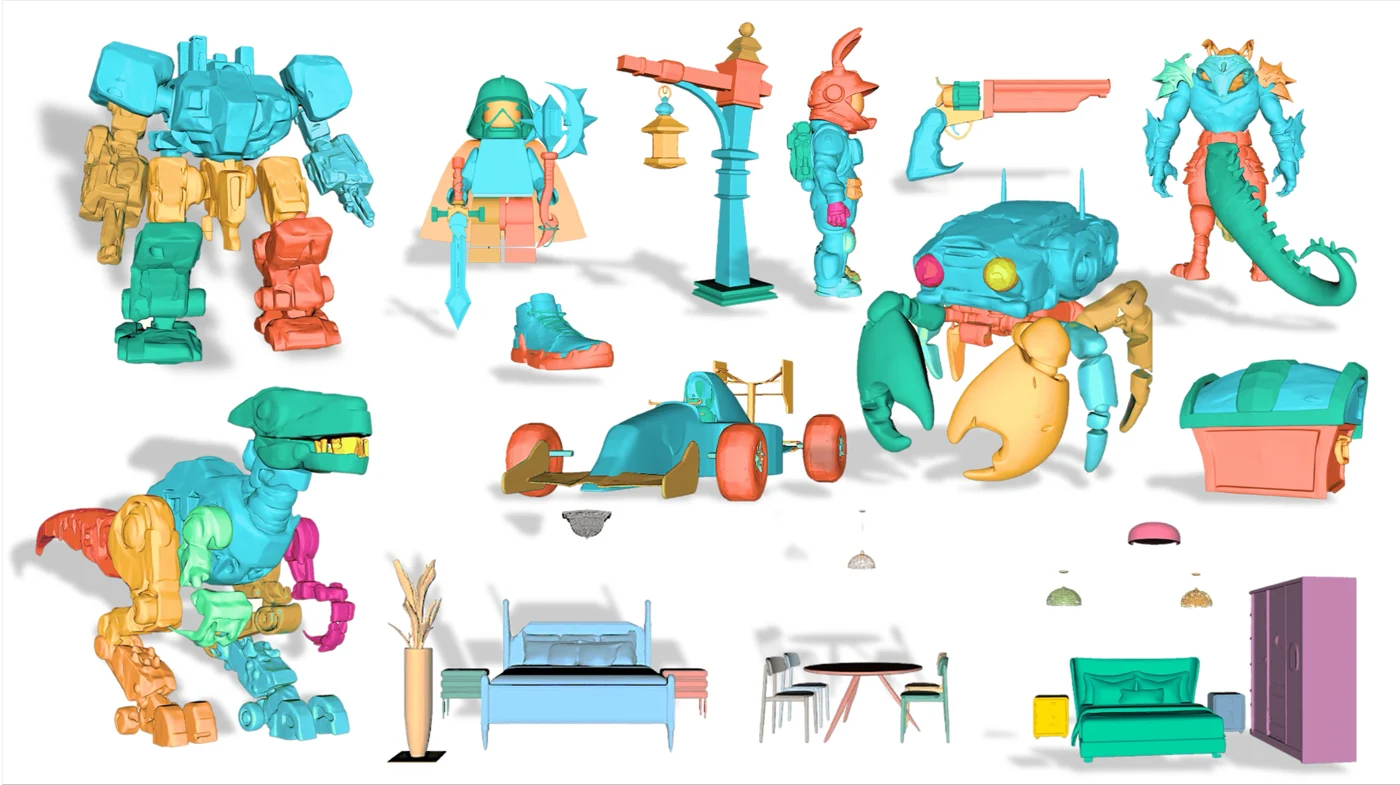
The research model reconstructs multiple parts jointly from a single RGB image, without requiring a segmented input image. Its object examples and scene variant explore a useful direction: 3D assets with structure you can actually work with.
Why separate meshes matter
A single fused mesh is convenient to preview, but awkward when you want to move a handle, replace a wheel, or assign a new material to one component. Distinct parts let a creator select and modify those pieces without first cutting them out of the surrounding surface.
This is particularly useful for props with obvious component boundaries. Think of a chest and its lid, a robot and its limbs, or furniture in a room. PartCrafter’s contribution is joint generation of those pieces while keeping the overall object coherent.
Part-aware generation is not just automatic segmentation
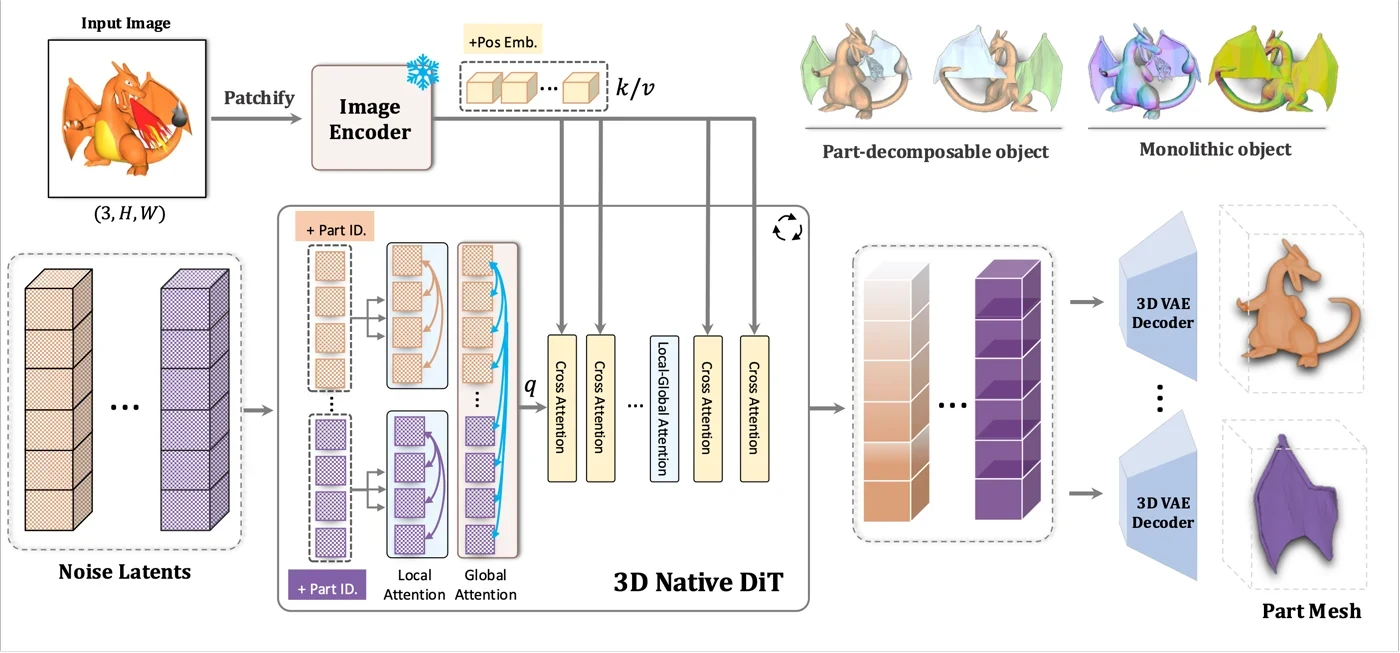
PartCrafter represents individual parts separately during generation and lets them exchange information at the object level. It is not simply a final step that splits an already generated monolithic mesh by color.
Because generation is conditioned on one view, an inferred boundary can still be wrong. A visually plausible division is not necessarily the way a real product is assembled. The number and arrangement of parts should be judged against the intended edit, not only against how colorful the showcase looks.
Objects and scenes are different use cases
The object model focuses on component-level structure within one asset. The PartCrafter-Scene variant targets scene reconstruction, where independent furniture and other objects can be more useful than a room fused into one surface.
For asset creation, component separation helps with material changes, variants, and selective replacement. For a scene, the valuable question is whether objects remain independently selectable and spatially consistent. A reconstructed scene is not automatically a playable environment with collision, lighting, and gameplay systems.
Editable parts are not a finished rig
Separate meshes make transformations easier, but do not by themselves provide joints, skin weights, mechanical constraints, or animation controls. Likewise, distinct components are not necessarily CAD solids with precise mating surfaces.
Before animating or assembling a result, check component origins, intersections, and gaps. For a hinged lid, the pivot matters as much as separation. For printing, each component also needs its own thickness, closed surface, and tolerance review.
Selection
Confirm that the pieces you need to edit are actually independent objects.
Assembly
Inspect seams, overlaps, alignment, and whether hidden components occupy sensible space.
Reuse
Review topology and material assignment before remeshing, rigging, or exporting a game asset.
What the official examples show
The exploded examples make component boundaries visible in a way that a textured beauty render cannot. They are useful evidence for the type of structure the model targets. The method diagram explains the local and object-level coordination behind that structure.
When evaluating an export, turn off textures and inspect one component at a time. Keep the original assembled version as a reference. That makes it much easier to tell whether an edit improves a part or merely hides a problem in the complete object.
Frequently asked questions
Does PartCrafter need a segmented reference image?
The published method generates multiple parts jointly from a single RGB image without requiring a segmented input image.
Are PartCrafter models automatically rigged?
No. Independent mesh parts can simplify selection and transformations, but joints, skin weights, constraints, and animation controls are separate work.
What is PartCrafter-Scene?
It is the scene-oriented variant, aimed at reconstructing layouts with independently represented objects rather than only the components of one asset.
Turn your own idea into a 3D asset
Start with a clear reference image or a focused prompt, then review the exported model before using it in your project.
Generate a 3D model